Grow Your Own Apples: Choosing and Preparing Seeds for Planting
A culinary gardener named Rowan sets the scene: a small rooftop kitchen garden that aims to transform humble fruit scraps into a future harvest. The first and most decisive step in this transformation is selecting the right seeds and preparing them correctly. Choosing seeds carefully reduces wasted time, improves germination odds, and increases the chance that a sapling will become a healthy tree suited to the local climate.
Understanding seed origin and genetic diversity
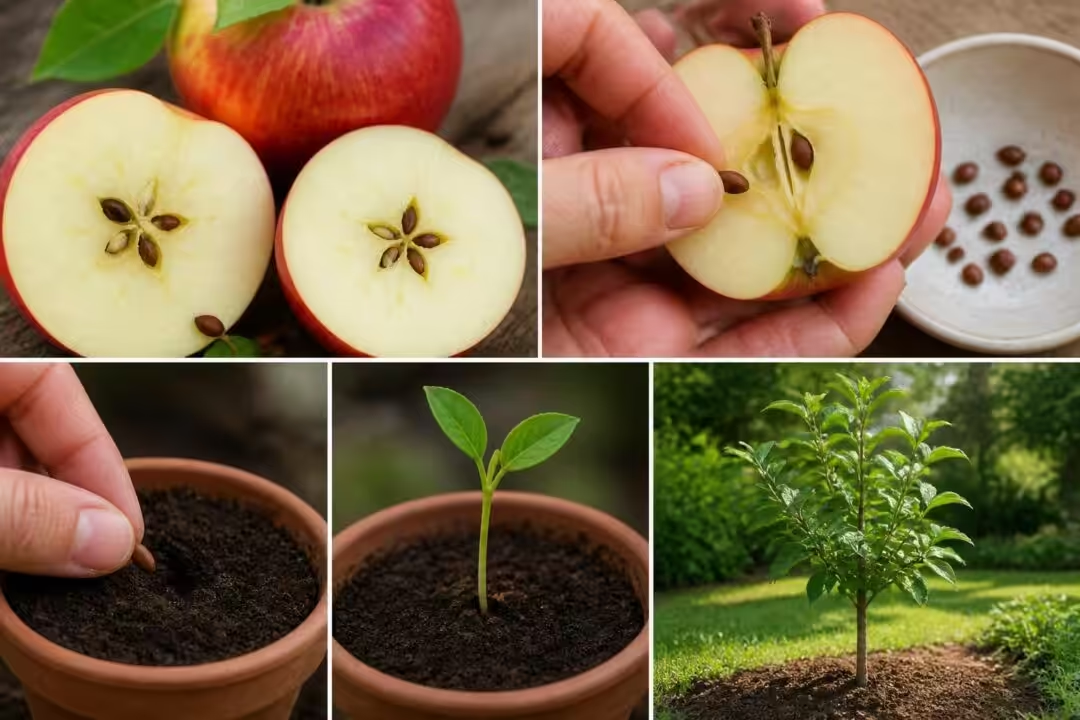
Apple seeds are not clones of the parent fruit. Each seed is the product of cross-pollination and carries a unique genetic combination. For a chef growing fruit to supply a kitchen, that unpredictability can yield surprising, delightful flavors—or disappointments. To tilt the odds toward success, prioritize seeds from mature, disease-free fruit harvested from trees known for resilience.
When collecting seeds, select apples that reached full maturity on the tree rather than those ripened off the branch. Mature fruits are likelier to contain viable seeds. Store seeds briefly in a cool, dry place before preparation; however, avoid prolonged storage beyond six months for best germination.
Visual and tactile inspection: what to look for
Inspect seeds for smooth, firm coats without cracks, soft spots, or mold. Any seed that feels spongy or shows discoloration should be discarded. A simple scratch test—gently scuffing the seed coat with a fingernail—can reveal vigor: a healthy seed often shows a slightly chalky inner surface beneath the coat, while an old or damaged seed may look brownish and desiccated.
Key practical tip: select seeds from multiple apples to increase genetic diversity and germination odds.
Cleaning and short-term storage before stratification
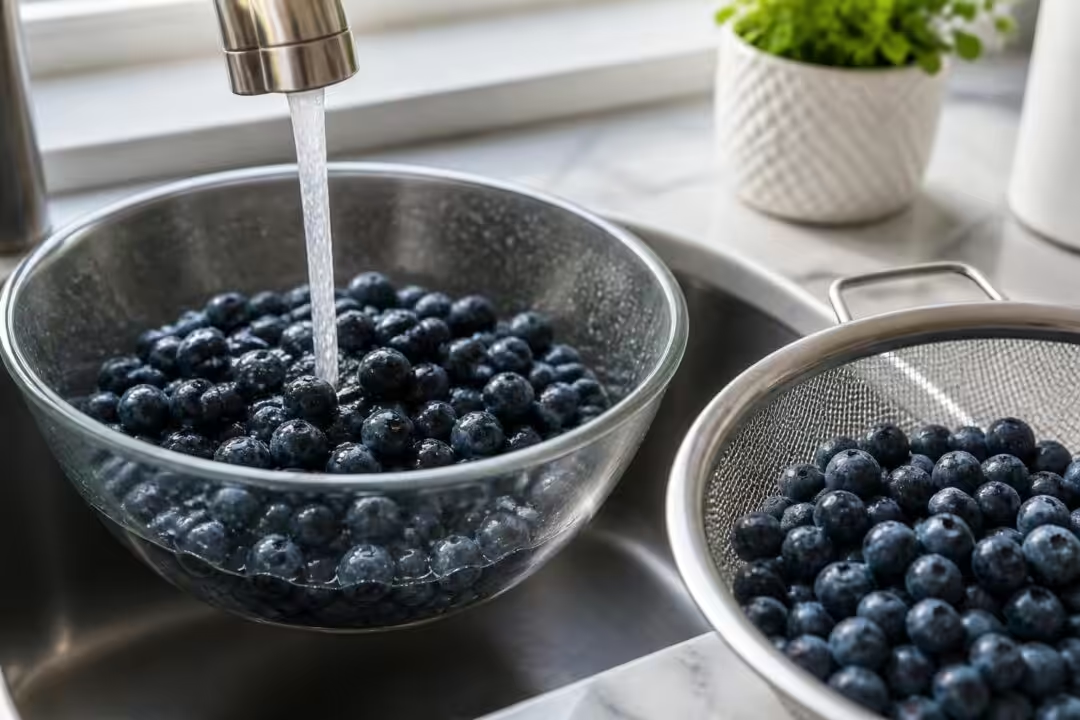
After extracting seeds from the core, rinse them under running water to remove residual sugars and flesh that might encourage mold. Pat them dry on a paper towel. For those who want a small culinary anecdote: when seeds are saved after making apple compote or chutney, the seeds must be rinsed thoroughly—leftover sugars create a micro-environment ideal for rot.
Store cleaned seeds in a breathable paper envelope in the refrigerator’s crisper if stratification cannot begin immediately. Avoid airtight plastic at this stage to prevent excess moisture and mold.
Preparing for stratification: materials and method
To mimic a winter dormancy period, prepare a medium such as moist peat moss, vermiculite, or a peat-perlite mix. Place seeds separated from each other to prevent clumping and fungal spread. Seal the mixture in a plastic bag or airtight container and keep it in the refrigerator at approximately 40°F (4°C) for a period that typically ranges from 30 to 120 days, depending on variety.
For the culinary gardener, the refrigerator sits as a practical tool—no elaborate equipment required. Check periodically for consistent moisture: the medium should feel damp but not waterlogged. Remove any seeds showing mold or softening.
Case study and culinary angle
Rowan once sourced seeds from a late-season heirloom apple that had a rich, spicy aroma. After careful selection and stratification, one seedling exhibited a slightly tart-sweet profile in its early fruit—suitable for both fresh eating and preserves. This anecdote underscores the creative aspect of growing from seed: experimentation parallels culinary recipe testing, where every trial yields new flavors and lessons.
Insight: careful seed selection and methodical preparation make future gardening and culinary planning far more reliable. Next up: unlocking dormancy through stratification and sowing the prepared seeds into a nurturing environment.
How to Germinate Apple Seeds: Stratification and Sowing Techniques
Stratification is the biological key that convinces an apple seed winter has passed and spring is safe to sprout. Understanding the why and how of this process helps a gardener avoid months of frustration and sets the stage for reliable germination.
The science behind cold stratification
Apple seeds possess physiological dormancy. In nature, this dormancy is broken by prolonged exposure to cold and moist conditions during winter. Replicating those conditions artificially through cold stratification encourages hormonal changes within the seed that initiate germination. Temperature control matters: aim for a refrigerator range of about 35–45°F (2–7°C).
Duration is variety-dependent. Early-ripening cultivars may need only 30–60 days, while some heirlooms require up to 120 days. Treat stratification as a patient culinary slow-cook: it cannot be rushed without compromising the final result.
Step-by-step stratification methods
Method A — Simple fridge bag:
- Mix seeds with moist vermiculite or peat moss. 🌱
- Place in a sealed plastic bag and label with date and variety. 🗓️
- Store in the refrigerator for the chosen period, checking every 2–3 weeks. 🔍
Method B — Layered jar:
- Use a small airtight jar with alternating layers of seed and slightly damp medium. 🫙
- Keep the jar within the fridge door, minimizing temperature swings. ❄️
Both methods work well; selection depends on available space and personal preference.
Sowing techniques for highest success
After stratification, sow seeds in a seed-starting mix with excellent drainage. Use small pots or seed trays and plant each seed roughly ¼ to 1 inch deep depending on local guidance. A light firming of the mix ensures contact with the seed without compaction. Maintain indirect light and consistent temperatures between 65–75°F (18–24°C) until sprouts appear.
To improve success rates, sow multiple seeds in a tray, then transplant the strongest seedlings after they develop their second true leaves. This selection mirrors kitchen practice where multiple trial sauces are tasted and the best is refined.
Monitoring and troubleshooting germination
Common issues include mold due to overly wet conditions and no germination due to insufficient stratification length. If mold appears, surface-clean the medium and allow slight drying cycles. If seeds fail to sprout after the expected window, consider extending cold treatment; sometimes an additional 30 days reproduces natural variability.
Track germination rates. Many apple seeds germinate at a 30–50% rate; saving extra seeds increases odds. Record successes and failures—this experimental log becomes invaluable for future batches and for refining culinary tree choices.
Practical example and transition
A home chef testing different apple seed sources kept a calendar detailing stratification days, variety notes, and germination results. The most reliable seeds came from late-season, tree-ripened fruit gathered in cool, dry weather. This empirical approach transformed hobby planting into a repeatable technique.
Insight: patience and careful tracking during stratification and sowing yield the strongest seedlings and set the stage for successful transplanting into prepared soil. Next: soil preparation and planting strategies for early-year seedlings.
Watching a demonstration can clarify each step; the video above complements hands-on practice with visual cues.
Planting and Soil Management for Young Apple Seedlings
Transferring seedlings into an ideal soil environment is akin to selecting the right pan for baking: the choice influences every subsequent outcome. Soil preparation, drainage, pH balance, and location dictate root development, tree vigor, and eventual fruit quality.
Soil composition and pH considerations
Apple trees thrive in well-draining soils rich in organic matter with a pH between 6.0 and 7.0. Soil testing remains essential: a basic home kit or a lab analysis reveals pH and nutrient status. If the soil is too acidic, agricultural lime can be added; if alkaline, elemental sulfur or organic matter can help. Amendments should be incorporated several weeks before planting to allow stabilization.
In urban or container settings, use a premium fruit-tree potting mix blended with compost and perlite for drainage. Avoid raw manure as it can burn young roots; instead, use well-rotted compost for a stable nutrient release.
Planting depth, spacing, and container choices
When moving seedlings into the ground, plant at the same depth as the root collar to prevent crown rot. For containers, select pots at least 15–20 gallons for the first few years, increasing size as the rootball grows. Spacing in an orchard setup depends on rootstock: seed-grown apples are often vigorous and will need at least 12–18 feet between trees; container-grown trees provide flexibility for smaller spaces.
For a kitchen garden, espalier or dwarfing rootstocks are alternatives to manage space, but seed-grown trees are genetically unpredictable in vigor; plan for the possibility of larger trees.
Practical fertilization schedule (table)
| Stage 🍏 | Timing 🕒 | Action 🌿 |
|---|---|---|
| Seedling 🌱 | 0–12 months | Light balanced fertilizer (10-10-10), monthly in growing season 🌞 |
| Young tree 🌳 | 1–3 years | Apply compost annually + spring slow-release N (10-5-10) 🌼 |
| Established tree 🍎 | 3+ years | Soil test-driven amendments; targeted micronutrients if needed 🔬 |
Fertilizer choices should follow a soil test. Over-fertilization encourages excessive vegetative growth at the expense of fruiting and increases pest susceptibility.
Water management and mulching
Young apple trees require consistent moisture to establish roots. Aim for roughly 1 inch of water per week, increasing frequency during hot spells. A drip irrigation system or soaker hose delivers water efficiently to the root zone while reducing foliar wetness that can encourage fungal disease.
Mulch with a 2–3 inch layer of organic material such as wood chips or shredded bark, keeping mulch away from the trunk to prevent rot. Mulching suppresses weeds, retains moisture, and slowly improves soil structure as it decomposes.
Case example: rooftop to backyard transition
Rowan transplanted a batch of seedlings from small nursery pots into 20-gallon containers filled with a fruiting mix. By incorporating compost, perlite for drainage, and a slow-release fertilizer, the seedlings established robust root systems over 10 months. Seasonal pruning and winter protection ensured survival through an unusually wet spring.
Insight: meticulous soil preparation and attentive watering produce durable root systems, minimizing transplant shock and building resilience. Next, focus turns to ongoing care: pruning, fertilization refinement, and shaping young trees for long-term productivity.
Caring for Young Apple Trees: Watering, Pruning, and Nutrition
Core maintenance of young apple trees blends horticulture with stewardship. The early years determine tree architecture, yield potential, and the ease of future orchard work. Care strategies must balance nourishment, form, and protection from stressors.
Watering rhythms and soil moisture monitoring
Even moisture encourages steady root growth. Use a finger test or a moisture meter to assess the top 1–2 inches of soil. If that layer feels dry, irrigate. Avoid waterlogging; standing water suffocates roots and predisposes trees to root rot.
During the first growing season, frequent shallow watering promotes surface root development; later, deeper, less frequent watering encourages deeper, drought-resilient roots. Adjust irrigation schedules in response to weather and growth phases.
Pruning fundamentals for structure and health
Pruning shape establishes a scaffold for future fruiting. Common systems include the central leader—a single dominant trunk—or the open-center—a vase-like structure encouraging light penetration. For seed-grown trees, the central leader approach typically supports vigorous growth.
Prune in late winter or very early spring before bud break. Remove dead, diseased, or crossing branches first. For young trees, selectively shorten competing leaders to encourage one main trunk and remove low suckers that divert energy. Prune conservatively in the first two years to avoid stunting growth.
Fertilization and nutrient timing
Young trees benefit from a balanced nutrient approach. Apply a slow-release fertilizer formulated for fruit trees in early spring. Monitor leaf color and growth: pale leaves often signal nitrogen deficiency, while distorted or mottled leaves suggest micronutrient issues.
Consider soil amendments like compost tea or organic foliar feeds if soil tests indicate lacking micronutrients. For culinary-focused growers, nutrient management directly affects fruit flavor, sugar content, and storage qualities.
Pest prevention and early intervention
Vigilant scouting is the cornerstone of integrated pest management (IPM). Inspect leaves, buds, and bark regularly for aphids, spider mites, and signs of codling moth activity. Employ physical controls—sticky bands, pheromone traps, and fruit bags—to reduce pest pressure without heavy chemical use.
Biological controls, such as encouraging predatory insects and birds, integrate well with a kitchen-garden ethos. Limit broad-spectrum pesticides that eliminate beneficial species and impair pollinators.
Practical anecdote and seasonal checklist
In one growing season, the rooftop garden observed an aphid outbreak on young shoots. Quick action—introducing ladybugs and pruning infested tips—contained the issue without chemical sprays. This anecdote illustrates how rapid, low-impact measures often suffice when vigilance is high.
- 🌿 Spring: prune minimally, apply slow-release fertilizer, check soil moisture.
- ☀️ Summer: monitor for pests, adjust watering frequency, thin crowded fruit later on.
- 🍂 Autumn: reduce irrigation, remove fallen fruit, prepare for dormancy.
Insight: consistent, moderately intensive care during the first three years defines long-term health and productivity. The next section explores pests, pollination, and how to time the harvest for peak flavor.
Visual guides can be especially helpful for pruning techniques and branch selection; the video above offers step-by-step demonstrations to complement hands-on practice.
Managing Pests, Diseases, Pollination and Harvest Timing for Best Apples
Producing quality apples requires both preventive planning and an ability to respond quickly to threats. Pollination, pest control, disease management, and assessing maturity are interconnected tasks that influence final fruit quality and yield.
Pollination essentials and orchard diversity
Apples typically require cross-pollination between compatible varieties. Encouraging pollinators is vital: plant nectar-rich companion flowers, avoid pesticides during bloom, and provide nesting habitat for bees. In small gardens, adding two or more compatible varieties within proximity will boost fruit set.
For a culinary gardener, pollination choices affect not only quantity but also genetic outcomes if seeds are later saved. Maintaining a mixed planting supports biodiversity and stabilizes harvests across variable seasons.
Recognizing and managing common pests
Key pests include aphids, codling moth, and spider mites. Each requires a different approach. Aphids can be controlled via insecticidal soaps and beneficial insects. Codling moths need monitoring with pheromone traps and bagging of developing fruit. Spider mites respond to increased humidity and miticide applications where necessary.
Early detection and targeted actions reduce overall chemical use and protect beneficial species.
Fungal and bacterial disease strategies
Common diseases—powdery mildew, apple scab, and fire blight—demand different controls. Cultural practices like pruning for airflow, sanitation (removing fallen leaves and fruit), and timely fungicide applications in high-risk seasons are effective. Fire blight, a bacterial disease, calls for removing infected limbs promptly and disinfecting tools between cuts.
Prevention tip: maintain good air circulation, reduce humidity around the canopy, and avoid high nitrogen late in the season to reduce susceptibility.
Harvest timing and fruit quality assessment
Determining harvest time blends visual cues and tactile tests. A ripe apple has full variety-specific color, a crisp bite, and flavor balance. The stem should release easily when gently twisted. If unsure, pick a few test apples and taste—culinary uses can guide decisions: a slightly tangy apple may be ideal for cider or baking, while a sweet one suits fresh plates and salads.
Record harvest dates and flavor notes for each seed-grown tree; this builds a personalized database that refines future culinary planning.
Practical checklist and prevention list
- 🛡️ Scout weekly for pests and early disease signs.
- 🌼 Plant pollinator-friendly flowers and avoid bloom-time sprays.
- 🧼 Sanitize pruning tools after cutting diseased wood.
- 🍏 Bag fruit if codling moth pressure is high to protect developing apples.
- 📖 Keep a harvest and care journal to track variety performance and flavors.
These routine actions protect yield and fruit quality while aligning with a sustainable, culinary-focused garden approach.
Insight: integrating pollinator support, vigilant scouting, and thoughtful harvest assessment produces apples that satisfy both palate and pantry. The next season’s planning draws from these observations, turning each harvest into data for more delicious results.

Hi, I’m Landon Brooks. I am the editor-in-chief of Cook and Design, but for the first decade of my working life I was actually a product designer in New York.