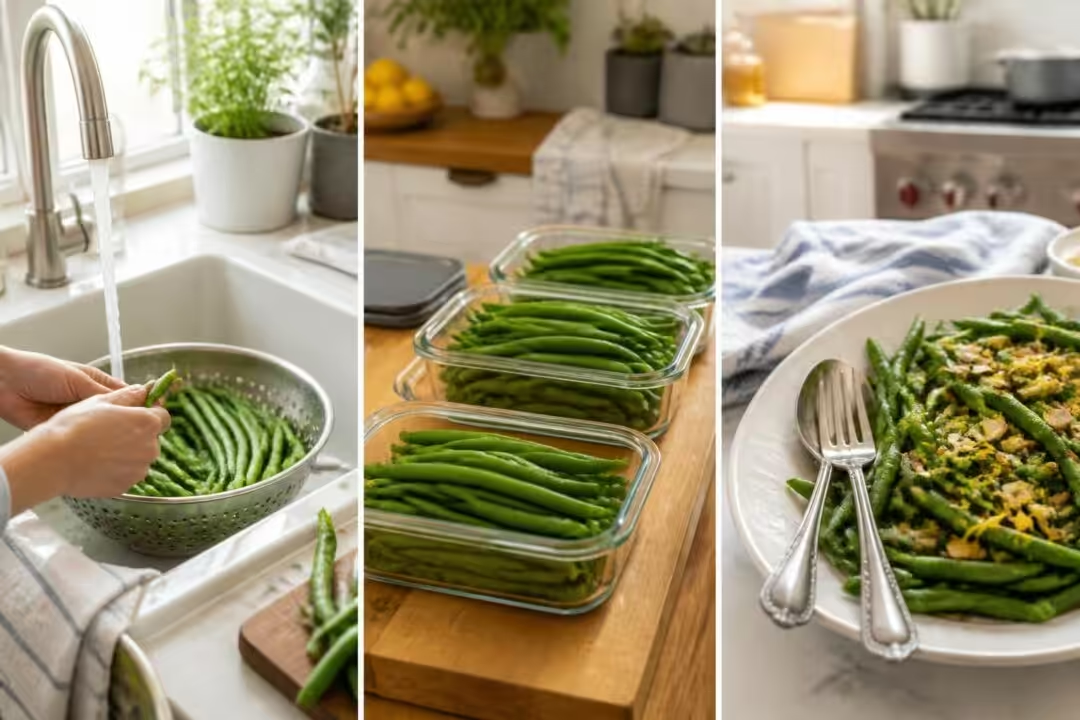
Prep Techniques for Make Ahead Green Beans: Blanching, Shocking & Drying for Crisp-Tender Results
Preparing green beans in advance demands attention to technique as much as timing. The core movement that preserves color, texture and flavor is a precise cycle of boiling, cooling and drying. This section unpacks the method step by step, with practical rationale and examples drawn from professional kitchens and the fictional catering company GreenFork Catering, which regularly preps vegetables for events of 50–200 guests.
Start with the water. A large saucepan filled with about 8 cups of water is ideal for 1 pound of beans; it allows rapid recovery to a boil when vegetables are added. Season the water with about 1 tablespoon of salt—this seasons the beans from the inside out and enhances their vegetal sweetness.
Why blanch, and how long?
Blanching halts enzymatic processes that dull color and weaken texture. The target is a crisp-tender interior with a bright exterior. For most green beans, a short blanch of roughly 1–4 minutes works, depending on bean thickness. In a practical example, thin straight beans will need closer to 1 minute, while thicker Romano-style beans might require 3–4 minutes.
When testing readiness, remove one bean and bite it: there should be a slight snap with no raw, chalky center. Overcooking during blanching is the most common rookie mistake; it cannot be reversed after the cooling step.
Shock immediately: the ice bath rule
Once beans hit the target texture, drain them and plunge them into an ice water bath for at least 1–3 minutes. This rapid cool-down stops cooking instantly and locks in that vivid green hue. At GreenFork Catering, the cold shock is non-negotiable—it ensures repeatable color and makes the beans safe to store ahead for up to 48 hours when handled properly.
After shocking, drain thoroughly and pat dry between layers of paper towels. Excess moisture is the enemy of a proper finish: it prevents butter or oil-based sauces from coating evenly and can dilute flavor.
Practical examples and mini-case
At a holiday brunch serving 120 guests, GreenFork prepped 10 trays of beans the day before. They blanched in two large stockpots, shocked in two oversized bowls full of ice water, and spread beans in single layers on sheet pans lined with paper towels to dry. This prevented steaming and preserved crispness.
A home cook preparing for a family dinner can mirror this approach at smaller scale: use a single pot, prepare an ice bath in a large bowl, and store dried beans in an airtight container between paper towels for up to 24–48 hours.
| Step ✅ | Time ⏱️ | Tip 💡 |
|---|---|---|
| Boil water 🔥 | 3–5 minutes to reach rolling boil | Use plenty of water so temp recovers quickly 🧂 |
| Blanch beans 🥬 | 1–4 minutes depending on thickness | Taste-test for crisp-tender texture 😋 |
| Shock in ice bath ❄️ | 1–3 minutes | Stop the cooking immediately to preserve color 🔵 |
| Dry thoroughly 🧻 | 2–5 minutes patting | Layer on paper towel; avoid moisture for sauce adhesion ✅ |
Following these steps guarantees a base that responds well to finishing sauces and holds up in a make-ahead workflow. The next section will cover how to store these prepped beans for the best freshness and safety when preparing ahead.
Store Ahead: How to Refrigerate and Preserve Make Ahead Green Beans Safely
Storing prepped green beans correctly is as crucial as the blanching process itself. Proper storage protects texture, prevents off-flavors and reduces food-safety risk. This section examines container choices, layering methods, refrigeration timing and real-world examples from GreenFork Catering’s prep line.
First, choose the right container. Airtight containers or high-quality resealable bags work best to limit moisture exchange while preventing absorption of other refrigerator odors. When using containers, arrange beans between layers of paper towels to wick away residual moisture and keep surfaces dry.
Timing windows: how far ahead is safe?
Blanched and shocked beans can be stored for up to 48 hours when completely dry and refrigerated at 40°F (4°C) or below. The butter sauce or finishing glaze can be made up to 24 hours ahead and stored separately for best texture. For busy kitchens, the beans themselves may be blanched and stored, with the finishing sear and sauce applied on the day of service.
For home cooks planning a holiday meal, the practical routine is to blanch the day before, keep beans dry in an airtight box, and prepare the buttery finish just before serving. This minimizes last-minute work while preserving peak texture.
Reheating and serving considerations
When it’s time to serve, let refrigerated beans come to room temperature for about 30 minutes if they will be served warm. Alternatively, gently rewarm in a skillet over medium heat for 2–3 minutes with a splash of butter or oil to revive the silky coating without overcooking. Microwaving works in a pinch but risks a softer texture.
GreenFork avoids reheating large batches in trays; instead they finish in skillets to maintain a bright, silky finish and to allow a crisp sear on nuts or aromatics added last minute.
- 🧊 Dry storage: Pat beans thoroughly—damp beans spoil faster.
- 🥡 Separate sauce: Store butter sauce separately to maintain texture.
- 🌡️ Temperature: Keep at or below 40°F (4°C) to ensure safety.
- ⏳ Use-by: Consume within 48 hours for best quality.
Food safety note: if beans show off-odors, sliminess, or a strange color, discard them. When prepping for events, label containers with prep time and date to keep the service team synchronized.
To visualize technique and reheating tricks, a concise video demonstration can be helpful. Watch a short tutorial that focuses on blanching and shocking technique as used by teaching kitchens and catering pros.
After following the storage best practices above, these beans retain color and snap, and the finishing step becomes a matter of minutes. Next, the focus turns to finishing flavors that transform reserved green beans into a memorable side.
Serve and Finish: Butter, Almonds & Lemon Techniques to Elevate Make Ahead Green Beans
finishing prepped green beans is where culinary creativity meets efficiency. A simple garlic-lemon-butter approach, paired with toasted almonds, creates texture contrast and a bright flavor profile that holds up even when the dish is made ahead. This section explains the finishing steps in detail, with timing, substitutions and plating ideas.
Begin by toasting nuts. In a large skillet over medium heat, toast about ⅓ cup sliced almonds in 2 tablespoons of butter for 3–5 minutes until golden. Stir frequently to prevent burning and remove the nuts as soon as they show a light brown color. This adds a nutty crunch that complements the beans’ snap.
The gentle butter finish
After toasting and removing the nuts, warm the remaining 1 tablespoon butter over medium heat. Add the blanched beans and cook, tossing frequently for 2–3 minutes to heat them through and allow the butter to coat each bean. Finish with 1 teaspoon lemon peel (or a bit of zest), and ¼ teaspoon black pepper, plus the reserved ¼ teaspoon salt to taste. Toss to combine and return toasted nuts on top just before serving.
For dairy-free adaptations, olive oil replaces butter—use a high-quality extra-virgin oil and finish with lemon to maintain the bright finish. For a more herbaceous version, fold in 2 tablespoons of fresh chopped parsley or thyme at the end.
Examples and plating
At a plated dinner service for 80, GreenFork finishes beans in batches on the line, using shallow pans warmed over low heat to keep the beans warm without continuing to cook them. The toasted almonds are sprinkled just before plating to maintain crunch.
For a buffet, toss beans fully in the butter sauce, but reserve a portion of toasted nuts and a final squeeze of lemon to refresh trays right before guests arrive. This preserves both texture and vibrancy for the first pass.
- 🍋 Lemon brightness: add zest, not only juice, to keep aroma fresh.
- 🥜 Nut crunch: toast nuts until just golden for maximum flavor.
- 🧈 Butter finish: low heat to avoid breaking the sauce.
- 🌿 Herb option: parsley or dill brightens without competing with lemon.
For hands-on visuals that show the correct timing for toasting nuts and finishing green beans in a skillet, try this chef demonstration.
When executed with care, the butter-almond-lemon finish uplifts prepped beans into a dish that looks and tastes freshly made. The next section explores creative variations and menu contexts for these green beans.
Variations, Substitutions & Menu Ideas for Make Ahead Green Beans
The basic make-ahead green beans recipe is a versatile template. Modifying nuts, citrus, seasonings or cooking fat creates distinct dishes suitable for casual dinners, holiday spreads or refined plated service. This section outlines imaginative variations and how to scale them, illustrated by a GreenFork Catering holiday menu case.
Begin with nuts and citrus swaps. The recipe scales beautifully: try hazelnuts with lemon for a toasty profile, pecans with orange peel for a deeper fruit note, or pistachios with lime peel for a Middle-Eastern twist. Each substitution shifts the aroma and mouthfeel while keeping the structure intact.
Dairy-free and allergen-aware options
For dairy-free kitchens, replace butter with a quality olive oil or vegan butter. To accommodate nut allergies, replace toasted nuts with toasted seeds—pumpkin or sunflower seeds provide similar texture and are often safer for guest lists. When designing menus, note allergen flags and offer a plain, toasted-seed variant for inclusive service.
GreenFork once catered a wedding with 220 guests and three dietary categories: omnivore, nut-free, and vegan. The team prepped one large batch of blanched beans and finished three small pans: one with butter and almonds, one with olive oil and lemon for vegans, and one with olive oil plus toasted seeds for the nut-free option. This minimized prep while satisfying restrictions.
Global flavor profiles and pairings
Adapt the finish to regional tastes: add soy and toasted sesame with a squeeze of lime for an Asian-leaning side, or toss with preserved lemon and toasted pine nuts for Mediterranean influence. Spicy variants can include a pinch of red pepper flakes added to the butter during melting.
- 🇮🇹 Mediterranean: pine nuts + preserved lemon + parsley 🌿
- 🇲🇽 Zesty: lime zest + toasted pepitas + chili flakes 🌶️
- 🇯🇵 Umami: toasted sesame + soy + a splash of rice vinegar 🍶
- ♻️ Vegan: olive oil + toasted seeds + extra lemon 🍋
Scaling tips: when doubling or tripling, maintain the beans-to-water ratio and work in batches to avoid overcrowding during blanching. Use larger stockpots and multiple ice baths if needed. The same finishing logic applies—finish in batches to ensure even coating and maintain texture.
Menus pairing: these green beans pair elegantly with roasted poultry, grilled fish, holiday ham, or as part of a vegetarian plate with mashed potatoes and roasted root vegetables. For a tapas-style menu, present small bowls of different finished variants for guests to mix and match.
Variety makes the humble green bean a kitchen workhorse. The next section will tackle common mistakes and chef secrets that protect those hours of prep and ensure consistent results.
Common Mistakes, Timing & Chef Secrets for Perfect Make Ahead Green Beans
Even experienced cooks stumble on a few recurring pitfalls when making green beans ahead. This section collects chef-tested solutions and a precise timeline to avoid common errors like limp texture, floppy nuts, or separated sauces. A short narrative follows the fictional sous-chef Maya of GreenFork as she troubleshoots a large-scale service.
Common mistake: overcrowding the blanching pot. When water temperature drops too far, beans cook unevenly. The remedy is simple: blanch in batches or use more water. Maya once faced a last-minute surge for a plated event and learned to stagger blanching by 10–15 minutes to keep each batch consistent.
Chef secrets for flavor layering
Salt in the blanching water seasons beans internally. Add finishing salt sparingly for layered seasoning rather than salting heavily at the end. Also, infuse butter with garlic by removing the pan from heat and allowing residual warmth to mellow the garlic—this prevents bitter burnt notes.
Another pro move: toast nuts separately and add them right before service to preserve crunch. Lastly, add lemon zest (rather than hot lemon juice) to the finished beans for an aromatic lift that won’t break the sauce’s texture.
| Issue ❌ | Fix ✅ | Chef Tip 🌟 |
|---|---|---|
| Mushy beans 😕 | Reduce blanch time; shock immediately | Test a bean during blanching to set timing ⏱️ |
| Watery sauce 💧 | Dry beans thoroughly; add sauce just before serving | Pat with paper towels to remove surface moisture 🧻 |
| Burnt garlic 🔥 | Infuse garlic off-heat or use raw minced for make-ahead | Garlic cooks in residual heat—watch carefully 👀 |
- 🛠️ Tools to keep handy: large stockpot, colander, large bowl for ice bath, sheets pans, airtight containers.
- ⏰ Timing checklist: set alarms for blanch cycles to prevent distractions.
- 📋 Service note: label containers with prep time and intended finish for the line cook.
Maya’s final insight before service was pragmatic: treat make-ahead as a staged process—blanch, shock, dry, store, then finish. Each stage preserves a different quality: color, texture, dryness, and flavor. Respecting each stage ensures that the final dish reads as freshly made even when most work happened earlier.
Those who follow these chef secrets and timing strategies will find make-ahead green beans both reliable and versatile—ready to support any menu with confidence.

Hi, I’m Landon Brooks. I am the editor-in-chief of Cook and Design, but for the first decade of my working life I was actually a product designer in New York.