| Sections / What to expect 📚 | Key notes / Quick wins ⚡ |
|---|---|
|
1. Stove method step-by-step 🔥 2. Water ratios & texture control 📏 3. Rinsing, soaking & troubleshooting 🧼 4. Storage, sourcing & nutrition 🛒🍚 5. Rice cooker, Instant Pot & pressure cooker options ⚙️ |
• Use a 1:2 rice-to-water ratio for standard fluffy rice ✅ 😊 • Always rinse until water runs clear and soak 20 minutes before cooking 💧🕒 • Simmer 12–15 minutes on lowest heat then rest 5 minutes before fluffing ✨ |
The subject of Sona Masoori rice matters because it is both an everyday staple and a design object for the plate — light, quick to cook, and forgiving when treated with intention. This guide translates tested stovetop technique into adaptable rules, connects sourcing and storage to texture, and shows how modern kitchens (from rice cookers to Instant Pots) can respect the grain’s subtlety while producing reliably photographed, restaurant-ready bowls.
How to Cook Sona Masoori Rice on Stove: Step-by-Step Stovetop Method for Fluffy Grains
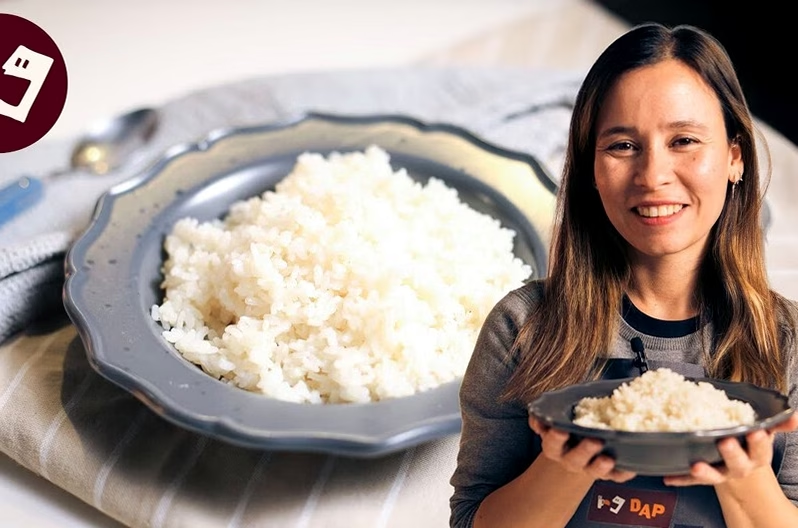
For cooks who value visual clarity on the plate, the stovetop method for Sona Masoori gives the most control over final texture and appearance. The process focuses on consistent measurement, gentle heat management, and a mandatory pre-hydration phase that affects both mouthfeel and the way the rice photographs. The core rule to remember is the volumetric balance: a 1 cup rice : 2 cups water baseline for standard fluffy grains, adjusted only with intent.
Equipment and mise en place
Use a heavy-bottomed pot with a tight-fitting lid; the weight of the base prevents hot spots and the seal keeps steam where it belongs. Measure rice and water with the same cup — volumetric consistency matters more than scales in routine weeknight cooking. A mesh sieve for rinsing and a fork for gentle fluffing complete the simple kit.
Step-by-step ritual
1) Rinse the rice in a bowl until the water runs clear — normally three cycles. This removes excess surface starch and prevents the grain from clumping during simmering. 2) Submerge the rinsed rice in the final measured water and let it sit for 20 minutes at room temperature. This pre-soak hydrates the core so the grain cooks evenly. 3) Bring the pot to a rolling boil on high. Once boiling, immediately reduce to the lowest possible flame, cover with the lid, and simmer for 12–15 minutes. 4) After turning off the heat, allow the pot to rest, still covered, for 5 minutes. Finally, fluff gently with a fork to separate grains without breaking them.
Design-minded plating tips
Sona Masoori’s lightness supports clean, minimalist plating. Use shallow matte bowls or cream-toned ceramic with space around the mound of rice. For editorial shots, tilt the bowl slightly and let a small drizzle of ghee or a scattering of toasted cumin seeds catch the light. Practically, leave a small vent in the lid during the 5-minute rest if the kitchen is humid; it prevents condensation from soaking the top layer.
Example case: A hypothetical neighborhood bistro, “Oak & Grain,” developed a lunchtime thali during a slow week by standardizing the 1:2 ratio and the 20-minute soak. The result: consistent portion yield, improved yield accuracy for cost control, and a visible difference in bowl composition that increased repeat orders. Insight: technique is as much about repeatability as it is about flavor — the simplest rituals deliver the most reliable results.
Key insight: the stovetop method turns small rituals (rinsing, soaking, low simmer, resting) into predictable results — perfect for cooks who care how a plate looks as much as how it tastes.
Perfect Water-to-Rice Ratio for Sona Masoori Rice and Texture Adjustments
Water volume is the single most decisive variable when cooking Sona Masoori. While the baseline is a 1:2 rice-to-water ratio, slight adjustments allow cooks to tailor texture for specific dishes: distinct grains for fried rice, slightly soft for curd rice, or somewhere in between for dal and sambar. The goal is to control expansion rather than simply soak the pan — too much water yields a cohesive, gummy texture; too little leaves the grain chalky at the core.
Practical ratio variations
• Firm / separated grains: use a 1:1.75 ratio. This is ideal for stir-fried rice or vegetable pulao where the grains need to withstand tossing. • Standard fluffy: the canonical 1:2 ratio works for daily plates — dal, sambar, rasam — where grains should be airy and separate. • Softer / slightly sticky: a 1:2.25 ratio suits curd rice or dishes where a creamier mouthfeel is desirable.
Why volumetric consistency matters
Always use the same measuring cup for rice and water. A consistent cup preserves the volumetric logic across batch sizes; 1 cup rice to 2 cups water yields roughly three cups cooked, which scales linearly: 2 cups rice : 4 cups water, 3 cups rice : 6 cups water. Using disparate vessels introduces subtle variability that compounds over time, especially in professional or batch cooking contexts.
How to adjust for older rice or altitude
Rice age matters. A bag bought and stored for over a year will typically be drier and may need an extra 2–4 tablespoons of water per cup, or a longer soak, to compensate. At altitudes above 5,000 feet the boiling point drops; expect to extend simmer time by 2–3 minutes and add a tablespoon or two of water if needed. These are small corrections that preserve the planned mouthfeel without changing technique.
Concrete example: Maya Patel, a hypothetical home cook in Denver, learned to add 2 tablespoons of boiling water and extend the low simmer by 3 minutes when she moved from sea level. Her rice retained distinct grains, and textures matched family expectations without overcompensation. Insight: small, measured adjustments beat guessing; write them down for reproducibility.
Key insight: treat the 1:2 ratio as a design baseline — tweak the water by small increments based on use case, rice age, and altitude for predictable texture outcomes.
Soaking, Rinsing, and Troubleshooting Sona Masoori Rice Texture Issues
Sona Masoori rewards ritual. The combination of triple rinsing and a controlled soak is the defensive line against two common failures: gummy, clumped rice and undercooked, chalky cores. Rinse away surface starch with gentle hand motion until the water clears, then soak in the measured cooking water for 20–30 minutes. This pre-hydration primes the grain so heat penetrates evenly rather than forcing the outside to gelatinize while the center lags behind.
Rinsing method and why it matters
Use cool water and swirl with the fingertips — avoid vigorous agitation that breaks grains. Most home cooks will reach clear water after three rinses, though heavily milled bags can take a fourth. The visible change in clarity is a practical cue: once the rinse water is no longer cloudy, proceed to the soak. This step is essential to prevent excess starch from turning the pot into a glue-like slurry.
Common failure modes and fixes
• Rice is gummy or sticky: likely causes are insufficient rinsing, over-stirring during cooking, or too much water. Remedy: for the next batch, rinse until clear, reduce water slightly (try 1:1.9), and avoid lifting the lid. • Rice is hard / chalky in center: usually due to skipping the soak, under-hydration of older rice, or heat that was too high during simmer. Remedy: add 2 tablespoons of boiling water, return to low heat, re-cover and steam 3 more minutes. • Burnt bottom: caused by excessive heat or inadequate pot base. Prevention: invest in a heavy-bottomed pot and reduce flame early in the simmer phase.
Handling leftovers and food safety
Cool cooked rice to room temperature within an hour and refrigerate. Sliced portions freeze well for 2–3 months; thaw in the refrigerator or microwave. For reheating, sprinkle a few tablespoons of water and cover the container to recreate steam and prevent drying. This practice preserves texture and keeps grains separate rather than clumping.
Practical anecdote: A small Brooklyn supper club, “Mango & Maple,” standardized the rinse-soak-simmer-rest timeline across its line cooks. The consistency allowed the kitchen to plate identical bowls under service pressure; customers noticed the steadier mouthfeel and texture, improving reviews. Insight: simple, codified steps reduce variability and elevate perceived quality.
Key insight: rinsing and soaking are non-negotiable steps that convert a fragile, variable grain into a reliable ingredient — treat them as part of mise en place, not optional choreography.
Storage, Sourcing, Nutrition, and Using Sona Masoori in Balanced Thalis
Sona Masoori is a daily staple in many South Indian households because it’s light, affordable, and pairs naturally with lentils, vegetables, and chutneys. In grocery and kitchen design terms, consider both supply chain and storage to preserve aroma and performance. Buy fresher rice when possible; a bag less than a year old cooks better and yields a more aromatic profile.
Sourcing choices and brands
Cost-efficient bulk options are available at membership warehouses, while specialty Indian groceries carry a range of brands. Typical alternatives include Swad, Laxmi, and organic lines like 24 Mantra. If purchasing online, note harvest and pack dates; fresher rice behaves better in the pot. For cooks seeking consistent value, a larger bag from a trusted retailer often reduces cost-per-serving and maintains performance when stored correctly.
Storage advice
Uncooked rice: store in an airtight container in a cool, dry place. Add a few dried bay leaves or a natural desiccant to discourage pantry pests. Under these conditions Sona Masoori keeps well for 12–24 months. Cooked rice: cool quickly, refrigerate within an hour, and consume within 4–5 days or freeze in portioned containers for up to 3 months.
Nutrition and portioning for balanced meals
Sona Masoori is lower in starch and lighter than many long-grain whites; this makes it suitable for portioned thalis. One cup raw (≈220 g) yields roughly 700 g cooked, and a standard cooked serving of 100 g contains about 112 calories. For balanced plates aim to pair rice with a protein-rich dal or legume, a vegetable side, and a probiotic-rich raita for texture and nutritional completeness. Adding broths, edamame, or moringa leaves during or after cooking can increase protein and fiber without compromising the grain’s character.
- 🍽️ Meal setup: 100 g cooked rice + 1 serving dal + 1 vegetable side for a balanced thali.
- 🌿 Add-ins: pine nuts, edamame, or moringa leaves boost protein and texture.
- 🧊 Storage tip: freeze portions for quick weeknight bowls.
Case example: A family-run South Indian café retooled portion sizes based on cooked-weight measurements rather than dry cups, improving calorie accuracy in menu descriptions and reducing waste. The business measured cooked rice by gram for consistent plate composition, improving customer trust and operational efficiency. Insight: pairing storage and portion control with thoughtful add-ins turns rice from filler into a designed component of the meal.
Key insight: sourcing fresher rice and treating storage as a design decision preserves both flavor and functionality; portioning by cooked weight improves nutritional clarity and plating consistency.
Alternate Cooking Methods: Rice Cooker, Instant Pot, and Pressure Cooker Techniques for Sona Masoori
Not every kitchen will use the stovetop each night; rice cookers, Instant Pots, and pressure cookers can produce excellent Sona Masoori when adjusted to the grain’s hydration needs. The central principle remains the same: control water volume and avoid overworking the grain. The automated devices simplify heat management, but the recipe still requires rinsing and a mindful water ratio.
Rice cooker method
The rice cooker is “set-and-forget” friendly for busy weeknights. Rinse the rice, transfer to the cooker, add water at the standard 1:2 ratio, and press the white rice setting if available. Let the cooker cycle and then allow a short rest of 5–10 minutes with the lid closed before fluffing. For firmer grains, reduce water slightly; for softer, add up to 2 tablespoons extra per cup. Example: a lunchtime catering run used several commercial rice cookers to produce consistent yields with minimal supervision.
Instant Pot / electric pressure cooker
Instant Pot users should adopt a slightly shorter cooking tempo: rinse and soak if time allows, then use a 1:1.25 to 1:1.5 ratio (rice to water) depending on model and desired texture. Pressure cook on high for 3–4 minutes and allow a natural pressure release for 10 minutes. Test a small batch first and document the exact water volumes; models vary. The Instant Pot’s sealed environment conserves steam, so less water is needed than stovetop.
Stovetop pressure cooker
A traditional pressure cooker accelerates service but requires a practiced eye. Rinse, soak when possible, and use a slightly reduced water measure compared to open-pot cooking. Quick-release can cause splitting; favor a short natural release to let steam finish the process. These devices are especially useful in busy home kitchens that also prepare dals and curries simultaneously.
- ⚙️ Rice cooker: 1:2 ratio, rest 5–10 minutes.
- ⏱️ Instant Pot: test with 1:1.25–1.5, pressure 3–4 minutes, NPR 10 minutes.
- 🔥 Pressure cooker: slightly reduced water, favor natural release to avoid splitting.
Practical vignette: A small catering collective standardized an Instant Pot workflow for Sona Masoori to match stovetop results. By documenting each model’s water adjustment and release time, the team achieved visual consistency across venues. The result: uniform bowls that photograph well and hold up on delivery. Insight: treat each device as a variant of the same design brief — the goal is identical texture and presentation, not identical raw numbers.
Key insight: alternate devices require modest water and timing adjustments; test, document, and standardize those adjustments to keep the plate consistent across equipment.

Hi, I’m Landon Brooks. I am the editor-in-chief of Cook and Design, but for the first decade of my working life I was actually a product designer in New York.