Sections
|
What to remember
|
Why Meat Gets Tough: The Heat-and-Time Rule (protein, collagen, and the trap of overcooking)
Texture in cooked meat is the intersection of muscle proteins and connective tissue behavior under heat. Two broad protein systems determine what is felt in the mouth: the long, load-bearing collagen network in connective tissue and the shorter, contractile myofibrillar proteins inside muscle cells.
When exposed to heat, myofibrillar proteins begin to denature and aggregate at relatively low temperatures, tightening muscle fibers and expelling water. This is the mechanism behind a dry, chewy chicken breast or an over-scorched steak. Conversely, collagen — the glue between fibers — requires sustained moist heat to hydrolyze into gelatin, the component that makes braises silky rather than tough.
How temperature and time work together
Collagen conversion begins below boiling: measurable softening starts around 140°F (60°C), but meaningful hydrolysis accelerates above 160°F (71°C). That means a stew left at a random simmer may not spend enough cumulative time in the optimal range to transform collagen into gelatin. The culinary rule becomes simple: for collagen-rich cuts, favor stable, sustained heat at modest temperatures rather than high, aggressive heat for short durations.
Example: a pan-seared chuck steak that reaches 145°F quickly will still be tough if collagen hasn’t been given time to break down. By contrast, the same cut held at 170–175°F (77–79°C) for two to three hours will yield a tender, shreddable bite as collagen slowly turns into gelatin.
Common errors that create toughness
Overcooking lean cuts is the most common pitfall for home cooks. Thin, low-fat pieces — turkey breast, sirloin, or pre-cut supermarket “stew meat” made from trimmings — have little collagen to save them; they rely on precision. Cooking them past their ideal internal temperature squeezes out juices and leaves a stringy, dry texture.
Another frequent mistake is uneven thermal control. Stovetop simmers can bounce between barely bubbling and a rolling boil, especially on busy ranges. A rolling boil is destructive for collagen: it agitates protein strands and leads to a stripped, chewy result rather than a soft, gelatinized matrix.
Practical signposts to watch for: surface dryness coupled with inner resistance points to premature muscle-fiber tightening. A pot that corners on a furious boil will show large bubbles breaking constantly; a gentle braise shows tiny, rhythmic bubbles every few seconds and a shimmering surface.
Insight: think of heat as choreography — the wrong tempo (too fast) or the wrong dancers (a lean cut) will break the performance. The remedy is deliberate heat control and selection of an appropriate partner (the right cut).
Diagnosing Tough Meat: Cut, Marbling, and Cooking Method (how to read the raw and the cooked)
Diagnosing a batch of tough meat starts with three observations before the first flame: the cut, the marbling, and the label. These three form the predictive model for whether a piece will respond well to a quick sear or demand a multi-hour braise.
Begin at the counter. A dense, slightly springy piece that yields little when pressed is a classic sign of connective-tissue richness and benefits from long, moist cooking. By contrast, a spongy, pale, loosely textured piece is usually lean muscle — it will be best served fast and hot.
Which cuts to choose and why they behave differently
For stews and long braises favor chuck, shank, and brisket. These muscles do work in the living animal and thus build collagen that makes them flavorful and economically sensible. A supermarket packet labelled generic “stew meat” can be anything; expect uneven cubes, variable collagen content, and inconsistent cooking times.
The relationship between fat and tenderness is more nuanced than “more fat equals softer meat.” Fine, evenly distributed intramuscular fat (marbling) lubricates fibers as proteins shrink, helping maintain juiciness. A large external fat cap protects during slow cooking and can be trimmed after to avoid greasiness.
| Cut 🍖 | Average raw cost/lb 💵 | Cooked yield % 📉 | Gelatin yield (g/100g cooked) 🧪 |
|---|---|---|---|
| Beef Chuck 🥩 | $5.29 | 62% | 4.1 g |
| Beef Shank 🍲 | $4.85 | 58% | 4.8 g |
| Pre-cut Stew Meat 🧾 | $6.49 | 54–60% | 2.2–3.6 g |
That table clarifies a common consumer surprise: the inexpensive raw price of chuck often outperforms a packaged “stew mix” when value and predictability are considered. The numbers underscore a central point — reliable collagen content saves time and avoids wasted meals.
Telltale signs during cooking
During the first hour of a braise, observe color, liquid behaviour, and smell. Proper browning (deep caramelization) is not cosmetic — it forms Maillard reaction compounds that support perceived tenderness by adding savory nuclei. Overcrowding the pan prevents both crust development and seals that keep juices inside.
Monitoring internal temperature with a probe provides objective feedback. For collagen-rich cuts aim for sustained readings around 170–175°F (77–79°C) during the slow phase; this predicts gelatin formation without devolving into mush. If the meat resists a fork even after two hours, continue cooking in 20-minute increments and monitor temperature — patience is the practical cure.
Real-world vignette: a designer-turned-home cook named Mina learned to request “chuck clod, not stew cubes” from her butcher. Over three trials, her stew texture became reliably tender when she switched to consistent cube size and used a probe thermometer. The change simplified scheduling and reduced food waste.
Insight: read meat visually and thermally; the decision at the counter sets up the rest of the method.
Practical Fixes: Braising, Pressure Cooking & Slow Methods (step-by-step remedies with trade-offs)
When meat is stubborn, the solution lies in matching the physics of collagen to the practicalities of the kitchen. Three core strategies dominate: traditional low-and-slow braising, pressure cooking to accelerate collagen breakdown, and slow-cooker methods with careful calibration.
Each approach has known advantages and operational trade-offs. Understanding those trade-offs allows the home cook to choose a method that fits time, equipment, and expected flavor outcomes.
Low-and-slow braising: how to do it well
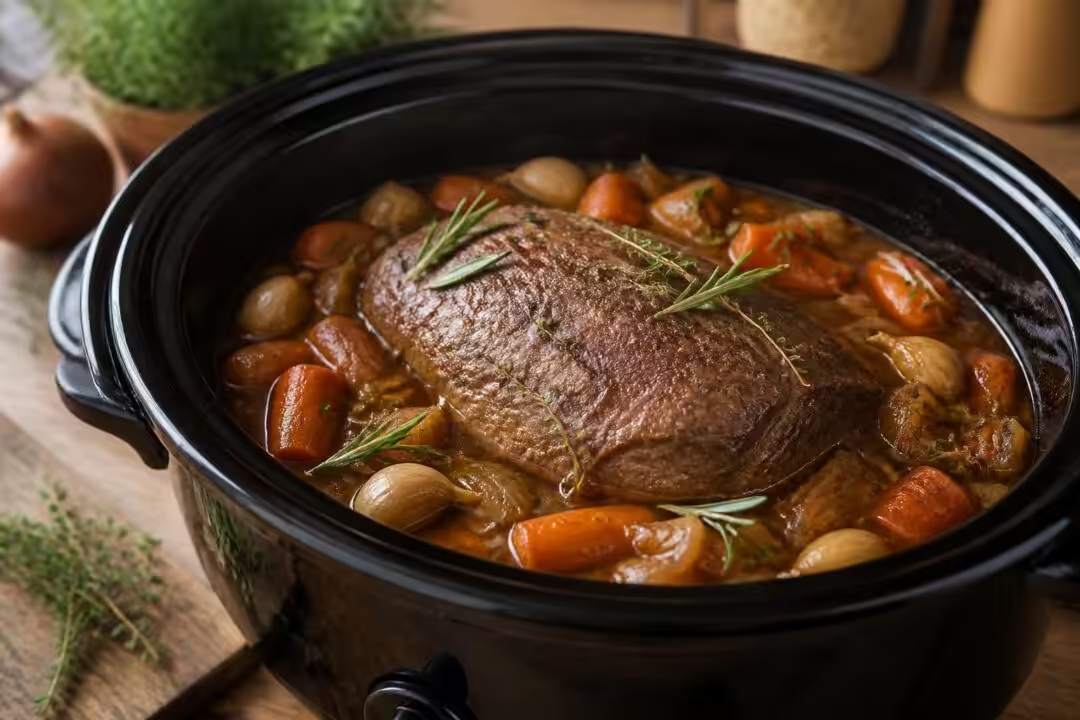
Use a heavy, lidded pot or Dutch oven. Brown cubes in small batches until a deep mahogany crust forms — this stage should not be rushed; darkness in the crust equals a more complex final flavor. Add aromatics, deglaze with wine or stock, then add enough liquid to come halfway up the pieces. Cover and move to a low oven set to 275°F (135°C) or simmer gently on the stovetop.
Target a liquid temperature that keeps the pot between 160–180°F (71–82°C). For most chuck or shank pieces, expect 2.5–4 hours for full tenderness. Avoid boiling; gentle simmering preserves the gelatin network and yields a glossy sauce.
Pressure cooking: fast and effective if handled with care
Pressure cookers reduce time by increasing boiling point and steam penetration. For 1- to 1.5-inch stew cubes, searing first is still recommended. Under pressure, collagen can become soft in 45–60 minutes, but beware of over-softening delicate fibers and a flatter aromatic profile. A two-stage approach — sear, pressure, then reduce uncovered for sauce concentration — often yields the best balance.
Slow cookers: calibrate and confirm
Many consumer slow-cookers run hotter than labels indicate. Test the actual temperature and if the “low” setting regularly exceeds 190–210°F (88–99°C), the result may be stringy rather than gelatinous. If using a slow cooker, cut pieces uniformly and brown first. Use the device’s low setting and plan for 6–8 hours, but verify texture periodically rather than relying on a clock alone.
- 🕵️♀️ Decision checklist: Check cut identity, brown until deeply caramelized, cover meat by ½ inch of liquid, target 170–175°F during the critical phase, test fork tenderness after 2 hours.
- ⏳ Timing tip: If texture is marginal at 2.5 hours, extend in 20-minute increments; collagen hydrolysis is nonlinear and patience pays.
- 🔧 Tools to own: a $12 probe thermometer and a $25 heavy Dutch oven drastically reduce guesswork.
Case study: a communal kitchen that switched from a rolling boil stovetop stew to a low-oven braise found that batches became consistent enough to serve in a rotating weekly menu. The reduced variability saved time and created a more photogenic bowl — an important detail for cooks who fuse design sensibility with weeknight practicality.
Insight: choose the method that aligns with the desired timeline and flavor profile; speed is a reasonable goal only when paired with correct searing and controlled pressure or temperature.
Surface Treatments: Marinades, Enzymes, and Mechanical Tenderizing (how to alter the surface to influence texture)
Surface-level interventions are useful when the problem is limited to outer fibers or when planning ahead. Three families of treatment exist: acid-based marinades, enzymatic tenderizers, and mechanical action such as pounding or scoring.
Each technique interacts differently with protein networks. Acid and enzymes loosen surface proteins and can improve bite, but they rarely penetrate deeply enough to replace low-and-slow cooking for collagen-rich cuts.
Acid marinades: proportion and timing
Acids denature proteins and enhance flavor. A working ratio for a reliable marinade is roughly 1 part acid to 3 parts oil with aromatics and salt. For a robust cut, marinate 4–12 hours in the fridge; for thin portions (cutlets, flank steak), 30 minutes to 2 hours is usually sufficient.
Caveat: prolonged acid exposure can produce a mushy surface as proteins crosslink excessively. Control time, and rinse quickly if a surface feels slimy after an overlong marinade.
Enzymes: papain, bromelain, and the risk of over-tenderizing
Enzymes from papaya (papain) and pineapple (bromelain) break peptide bonds. They’re effective but act quickly. A light enzyme rub for 30–60 minutes can help flank or skirt steak, but for a stew cut the enzymes won’t reach the deep collagen network and can cause a papery or spongy texture if used too long.
Practical application: apply a pineapple-based tenderizer to small, thin cuts; for larger pieces used in stews, rely on moist heat instead.
Mechanical tenderizing: pounding, scoring, and blade tenders
Pounding with a meat mallet or rolling pin physically shortens fibers, improving tenderness for cutlets and chicken breasts. For thicker steaks, a short run through a blade tenderizer will create channels for marinade penetration and disrupt fiber continuity. Use plastic wrap to keep surfaces clean and trim thin edges to prevent uneven cooking.
- 🍍 Enzyme tip: Use fresh pineapple juice sparingly; commercial powdered enzymes are more predictable.
- 🔨 Mechanical tip: Pound between two sheets of plastic until uniformly ¼–½ inch thick for rapid-cook proteins.
- 🧂 Marinade tip: Add 1 tsp kosher salt per cup of marinade liquid to improve water retention and seasoning balance.
Practical vignette: a small Korean-inspired pop-up in 2025 used a two-step surface strategy — enzyme salting for pork cutlets followed by quick pan-searing — to maximize tenderness and crispness. The result held up on the plate without collapsing into an indistinct mush, demonstrating that restraint in enzyme time preserves texture while improving tenderness.
Insight: surface treatments are powerful when targeted; they complement but do not replace the chemistry of slow collagen conversion.
Rescuing Already-Cooked Tough Meat & Storage Best Practices (practical rescue recipes and safety guidance)
Toughness discovered after cooking is an unhappy moment — but many problems are reversible. The core principle for rescue is to reintroduce gentle, sustained moisture and heat to encourage further collagen breakdown without triggering additional myofibrillar tightening.
For small batches, return the meat to a covered pot with ¼–½ cup of warm broth per cup of meat. Maintain a gentle temperature of 165–170°F (74–77°C) and check texture every 15–20 minutes. In most cases, 45–60 minutes of patient re-simmering produces measurable softening.
Pressure-cooker rescue
If braising did not fully resolve toughness and time is constrained, a pressure cooker can help. Use brief cycles: for 1–2-inch cubes, 20–30 minutes under pressure often completes collagen conversion. Always re-sear briefly if the surface needs flavor lift after pressure cooking.
Adding gelatin and body without hiding issues
When texture is only slightly firm but the broth is thin, a small amount of unflavored powdered gelatin (1 tsp per cup of liquid) added to warm broth can increase perceived richness without masking the meat’s chew. This is a cosmetic fix for mouthfeel, not a cure for deeply under-tenderized fibers.
- ♨️ Reheat gently: Warm to 165°F (74°C); do not boil or you risk re-denaturing gelatin into a stringy network.
- 🧊 Cooling protocol: Cool within 2 hours to 40°F (4°C) to prevent spoilage and protein degradation; divide into shallow containers for faster cooling.
- 🏔️ Altitude note: At high elevations, compensate for lower boiling points by extending time or using a pressure cooker.
Rescue example: a community kitchen reheated a large pot of stew incorrectly by bringing it to a rolling boil. The gelatin network collapsed and slices became stringy. The team recovered texture by simmering the stew at 165°F with a splash of acid (to balance flavor) and a final off-heat rest — the mouthfeel recovered sufficiently to serve without waste.
Final practical checklist before plating: confirm tenderness with a fork, rest 10–15 minutes covered to redistribute juices, slice across the grain only for quick-cooked steaks (for braises, slice after resting if presentation requires uniform pieces), and finish the sauce to the desired gloss.
Insight: most toughness can be fixed when treated as a temperature-and-time problem rather than a mystery; measured, slow remediation wins over panic interventions.

Hi, I’m Landon Brooks. I am the editor-in-chief of Cook and Design, but for the first decade of my working life I was actually a product designer in New York.