Juicy Baked Chicken Breast: The Moisture Science That Prevents Dry, Chalky Chicken
Juicy baked chicken breast is less about “talent” and more about understanding what makes this cut so unforgiving. Chicken breast is naturally lean, which means it has fewer internal fat reserves to protect it when heat climbs. Once the proteins tighten too far, moisture squeezes out and the texture shifts from tender to cottony—sometimes in what feels like minutes. That’s why the best cooks treat chicken breast like a precision project rather than a casual toss-and-hope situation. 🧠
To keep chicken breast succulent, the core goal is to manage protein tightening and moisture retention without sacrificing food safety. Heat causes muscle fibers to contract; as temperature rises, those fibers press water out. When cooking goes even slightly long, the loss becomes obvious: the surface looks bronzed, but the center eats dry. The fix is not drowning chicken in sauce afterward—it’s preventing the squeeze-out in the first place.
A simple fictional kitchen scenario helps: “Mara,” a busy parent who meal-preps on Sundays, used to bake chicken breasts until “they look done,” then slice them for salads. By Wednesday, the sliced pieces tasted dusty even when stored properly. Nothing about Mara’s seasoning was wrong; the problem was that her chicken crossed the line where moisture exits permanently. Once she switched to temperature-based cooking and rested properly, those same salads stayed satisfying all week. That’s the difference between guessing and controlling.
Three mechanics matter most: thickness uniformity, salt timing, and carryover cooking. Each addresses a different way dryness happens. Uneven thickness means the thin end overcooks while the thick end catches up. Salt timing impacts how well the meat holds water during heating. Carryover cooking explains why pulling at the right moment matters more than staying glued to a timer.
Why even thickness beats “perfect timing” 🎯
Chicken breasts rarely come in a shape that cooks evenly: one end is thick like a small pillow, the other tapers. In the oven, the tapered tip reaches higher temperatures sooner, and dryness begins there first. If baking continues to finish the thickest part, the tip becomes stringy and bland.
Flattening solves this because it reduces the time the chicken spends in the oven. The goal is not to obliterate it into a thin sheet; it’s to create a piece that’s roughly the same height from end to end, usually about 3/4-inch to 1-inch at the thickest point. That single adjustment makes timing more forgiving and browning more consistent.
Salt earlier for deeper seasoning and better juiciness 🧂
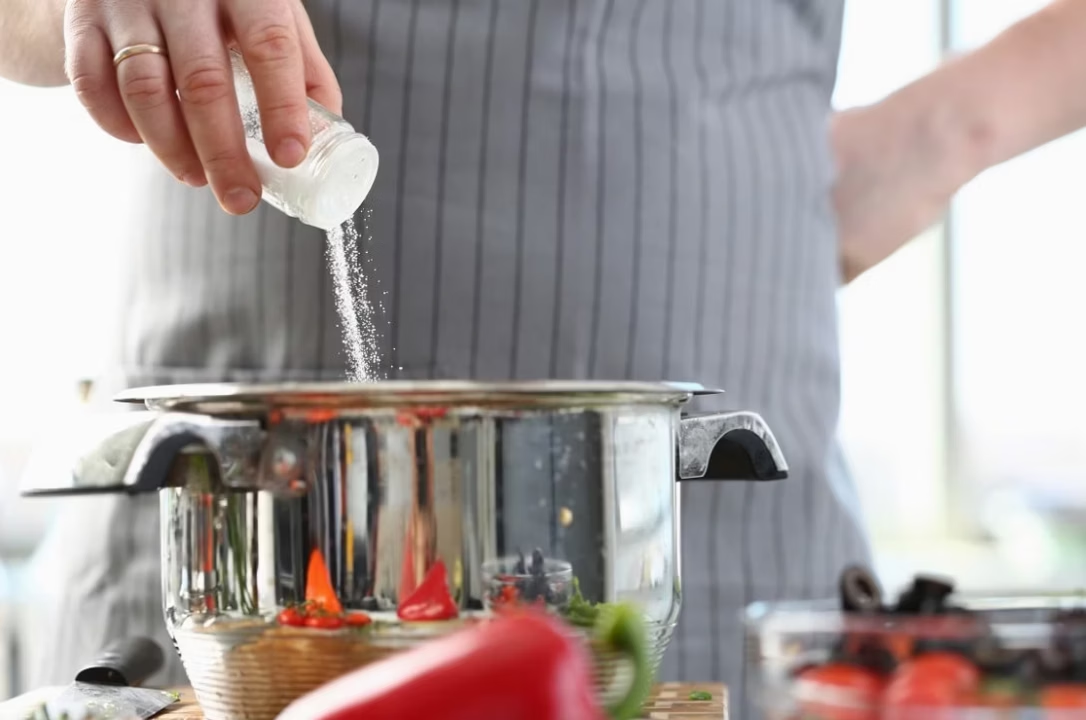
Salt doesn’t only add flavor—it changes the chicken’s ability to retain moisture. With a short rest after salting, the surface draws out a little moisture, dissolves the salt, and then that seasoned liquid is pulled back in. The result is chicken that tastes seasoned through the center and stays juicier after baking.
This doesn’t need to be an overnight project. Even 20–30 minutes of salting before baking can noticeably help. On a rushed night, the chicken can still be delicious without it, but the “why is this so tender?” effect often comes from that brief pre-salting window. ✨
Carryover cooking: the quiet hero of never-dry chicken 🌡️
Food safety guidance centers on chicken reaching 165°F (74°C) at the thickest part. The mistake is waiting until the thermometer reads exactly 165°F while the chicken is still in the oven. The moment it comes out, the heat stored in the outer layers continues traveling inward.
Pulling the chicken at 160–162°F, then resting it 5–10 minutes loosely tented with foil, lets carryover bring it to the safe zone while minimizing the time at the dryness-inducing temperatures. The insight that changes everything: juicy chicken is a temperature curve, not a single number.
Juicy Baked Chicken Breast Seasoning: A Flexible Formula That Works for Salads, Bowls, and Sandwiches
Seasoning is where baked chicken breast goes from “healthy protein” to “why does this taste restaurant-level?” The trick is to use a repeatable base that hits salt, savory aromatics, and color-building spices—then pivot the flavor profile without changing the cooking method. This keeps weeknight cooking creative without turning it into chaos. 🎨
Chicken breast doesn’t have much fat, so seasoning needs to do two jobs: build flavor and help the surface brown. a small amount of oil (or melted butter) helps spices cling and encourages better color. Paprika—smoked or sweet—adds warmth and a bronzed hue. Garlic powder adds savory depth without burning the way fresh garlic sometimes can at high heat.
Consider a practical case: “Dev,” a graduate student learning to cook, used to rely on bottled marinades. The results were inconsistent; sometimes the sugar burned, other times the chicken tasted salty on the outside and bland inside. Switching to a measured dry blend with oil fixed both problems. Dev could then “steer” the meal toward tacos, Italian plates, or lemony salads by adding one or two targeted ingredients rather than starting from scratch each time.
The “anytime” seasoning formula (simple, repeatable, strong) ✅
This blend is designed to taste good hot or cold, sliced or cubed. It’s also neutral enough to pair with dressings, sauces, or grains without clashing.
- 🍗 1 tsp kosher salt per pound of chicken
- 🧄 1 tsp garlic powder
- 🌶️ 1 tsp paprika (smoked for deeper flavor, sweet for gentler warmth)
- 🧂 1/2 tsp black pepper
- 🫒 1 tsp olive oil (or more as needed to coat)
That small list creates a reliable baseline. If the chicken will be served with a salty sauce (like a soy-based glaze), slightly reduce the salt in the rub. If it’s destined for a salad with a bright vinaigrette, keep salt steady and add zest after baking.
Flavor swaps that keep the same juicy baking method 🔄
Changing the vibe should feel like changing a playlist—same mood, new energy. Here are smart pivots that don’t require new timing.
- 🍋 Lemon-herb: add lemon zest + dried oregano + pinch of thyme; finish with lemon juice after resting.
- 🔥 Smoky BBQ-ish: smoked paprika + pinch of brown sugar + chili powder; serve with quick slaw.
- 🍅 Italian-style: Italian seasoning + extra garlic powder; shower with a little Parmesan after baking.
- 🌮 Taco night: cumin + chili powder + oregano; finish with lime and serve with beans.
These variations work because they respect how chicken browns. Sugar is kept minimal to reduce scorching at high heat, and acid is often added after baking so the surface still caramelizes properly.
A practical pairing mindset for 2026 home cooking 🥗
Modern meal routines tend to be modular: a protein, a vegetable, a starch, and a sauce. Chicken breast thrives in that system because it can be seasoned to match almost any “bowl culture”—Mediterranean with tzatziki, Southwest with salsa verde, or classic American with a mustardy pan sauce. The key is to keep the chicken itself juicy and balanced, so everything else is an upgrade, not a rescue mission. The guiding insight: season chicken like it will be eaten plain, even if it won’t.
Next comes the method that turns those seasonings into juicy slices—without stress or guesswork.
Watching a thermometer-driven bake once makes the logic click: the oven time matters less than the internal temperature and rest.
Oven-Baked Chicken Breast at 425°F: The Step-by-Step Method That Stays Juicy Every Time
The most reliable way to avoid dry chicken breast is to bake hot and fast, while controlling thickness and temperature. A higher oven setting like 425°F (218°C) encourages browning quickly so the interior spends less time in drying territory. This isn’t about aggressive cooking; it’s about efficient cooking. 🔥
There’s a rhythm to it that suits weeknights: heat the oven, prep the chicken while it warms, bake, rest, and slice. The steps are simple, but each one prevents a specific failure mode—rubbery edges, bland centers, or juices flooding the cutting board.
Pan setup: sheet pan, parchment, and airflow 🍽️
A rimmed sheet pan lined with parchment makes cleanup easy and reduces sticking. For even better browning, a wire rack can be placed on top of the pan so hot air circulates around the chicken. That airflow prevents the underside from steaming in its own juices, which can make the exterior soft.
If no rack is available, it’s still fine—just avoid crowding. When pieces touch, they trap moisture between them and slow browning. The chicken will cook, but the texture won’t be as satisfying.
Thickness control: pounding vs. slicing into cutlets 🥄
Flattening chicken between parchment sheets with a mallet (or even a sturdy rolling pin) creates uniform thickness. Slicing into cutlets works too, especially for sandwiches, but pounding preserves a generous portion size while evening the cooking.
A practical target is 3/4-inch to 1-inch. Thinner cooks quickly but can lose juiciness if forgotten; thicker increases the risk of drying before the center is safe. That middle zone gives the best margin for error.
Bake, check early, and pull at the right temperature 🌡️
Timers are helpful, but thermometers are transformative. Start checking a few minutes early, especially if the chicken pieces are smaller than average. Pulling at 160–162°F and resting is where the magic happens.
| Thickness 📏 | Oven Temp 🔥 | Typical Bake Time ⏱️ | Pull Temp 🎯 | Rest Time 🛑 |
|---|---|---|---|---|
| 1/2 inch (cutlets) 🍽️ | 425°F | 12–15 min | 155–158°F | 5–8 min |
| 3/4 inch ✅ | 425°F | 16–19 min | 160–162°F | 5–10 min |
| 1 inch (thicker) 💪 | 425°F | 20–24 min | 160–162°F | 8–10 min |
For cooks who prefer 400°F (204°C), the method remains the same but the bake time usually extends. The internal temperature target does not change, and that’s the whole point—cook to temperature, not to time.
Resting and slicing: the final juiciness lock 🔒
Resting isn’t a fussy chef ritual; it’s physics. Fresh-from-the-oven chicken has excited juices moving toward the surface. Cutting immediately releases them onto the board, leaving the meat drier. Resting 5–10 minutes lets those juices redistribute.
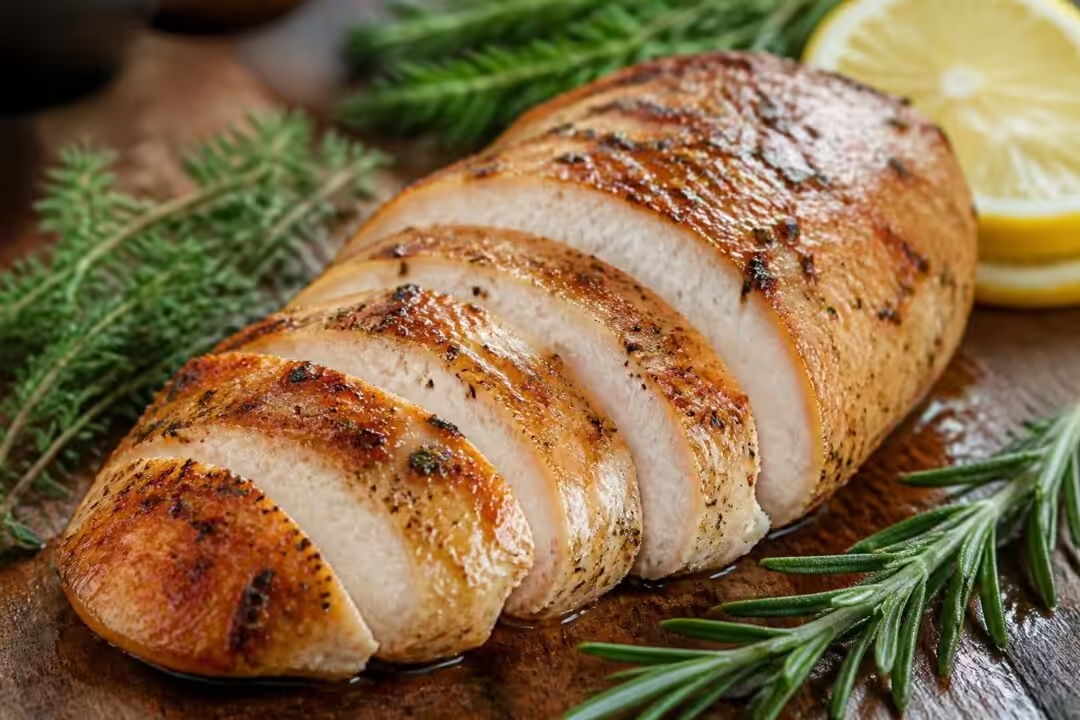
Slicing direction also matters. Cutting across the grain shortens muscle fibers, so each bite feels tender. For salads, thin slices work beautifully. For bowls, larger cubes stay moist longer and reheat more gently. The closing insight for this method: the last 10 minutes (rest + slice) decide whether the chicken eats juicy or merely looks juicy.
Seeing the sheet-pan setup and how early to probe with a thermometer makes the process feel as routine as making toast—only far more rewarding.
Dry Brining, Marinades, and Moisture Insurance: Advanced Tricks for Juicy Baked Chicken Breast
Once the core method is solid, a few upgrades can make baked chicken breast even more reliable—especially when dealing with extra-lean meat, unusually thick pieces, or meals served cold where dryness is more noticeable. These techniques function like “moisture insurance”: they widen the margin for error without turning dinner into an all-day project. 🛡️
It’s worth noting that these are not mandatory. Plenty of juicy chicken comes from even thickness and correct pull temperature alone. But for cooks who have been burned by dryness repeatedly, adding one extra layer of protection can rebuild confidence quickly.
Dry brine: the easiest high-impact upgrade 🧂
A dry brine is simply salting the chicken in advance and letting it rest uncovered. The uncovered part matters: it dries the surface slightly, improving browning, while the salt moves inward to season more deeply.
For a weeknight, 20–30 minutes is enough to notice improvement. For weekend prep, a few hours in the refrigerator is excellent. The chicken tends to come out seasoned through the center, not just on the crust.
A mini case study: Mara (the meal-prepper) tested two batches—one salted right before baking, one salted 30 minutes earlier. The earlier-salted batch stayed noticeably juicier after refrigeration, especially when sliced thin for wraps. The insight: dry brining improves both fresh texture and leftover texture.
Marinades: when they help—and when they hurt 🍋
Marinades can be useful, but they’re often misunderstood. Oil-based marinades help with flavor and surface browning. Yogurt or buttermilk marinades can tenderize slightly and protect moisture, especially for chicken that will be cooked hot. Acid-heavy marinades (lots of lemon juice or vinegar) can make the exterior turn mushy if left too long, then still dry out if overbaked.
For baking at high heat, a smart guideline is to keep acidic marinades short, and add fresh acid after cooking for brightness. A yogurt-based marinade, used for 30 minutes to a few hours, can be a lovely option for Mediterranean-inspired plates.
Covering vs. uncovering: steam is not the same as juiciness ☁️
Covering chicken breast traps steam. Steam prevents browning, and while it can keep the surface from drying, it also creates a softer, less appetizing exterior. The better approach is to bake uncovered for browning, and only tent with foil at the end if needed.
If the top browns too fast, foil can be placed loosely over the chicken for the last few minutes. That way, browning has already begun, and the foil becomes a safeguard rather than a default setting.
Small tools that pay off fast (no gadget overload) 🧰
One tool matters more than any other: an instant-read thermometer. It removes uncertainty and stops the cycle of “just a few more minutes.” A wire rack is helpful but optional. Parchment paper keeps cleanup easy and prevents sticking that can tear the surface and leak juices.
For cooks who love consistency, setting a personal rule helps: chicken comes out of the oven the moment it hits the pull temperature, even if the timer says otherwise. That discipline is what separates juicy chicken from accidental jerky. The final insight here: moisture protection is mostly decision-making, not expensive equipment.
Meal Prep and Reheating Juicy Baked Chicken Breast: Storage Rules That Keep It Tender for Days
Meal prep is where many chicken breasts lose their charm. The chicken may be juicy at dinner, then mysteriously dry after a night in the fridge. That’s not a failure of the recipe; it’s usually a combination of slicing too early, storing incorrectly, and reheating too aggressively. With a few adjustments, baked chicken breast can stay tender for 3–4 days refrigerated and still taste like it belongs in a fresh meal. 🥡
The first principle is simple: whole pieces stay moist longer than sliced pieces. Every cut exposes more surface area, and surface area is where moisture escapes during storage and reheating. If the chicken will be used throughout the week, keeping it whole and slicing only what’s needed pays off immediately.
Cooling and storage: prevent moisture loss without making it soggy ❄️
Let chicken cool slightly before sealing it in an airtight container. Sealing piping-hot chicken can create excess condensation, which softens the surface. Cooling too long uncovered, on the other hand, can dry it out. A balanced approach works: cool until warm, then store.
For best texture, store with any resting juices that collect on the plate. Those juices are flavor and moisture gold. If the chicken is intended for bowls, storing it with a spoon of broth or a light sauce can help too—just avoid drowning it, which can make texture mushy.
Freezing baked chicken breast without turning it stringy 🧊
Freezing works well when done tightly. Wrap individual portions, then place them in a freezer bag with air pressed out. Labeling with the date keeps rotation easy. Most home freezers keep quality best for 2–3 months. Thawing overnight in the refrigerator preserves texture better than rapid thawing.
One strategic move: freeze chicken in the form it will be used later. For wraps, freeze whole breasts to slice after thawing. For soups, freezing in chunks is fine. The insight: freeze with a purpose, not as an afterthought.
Reheating: gentle heat is the secret to keeping it juicy ♨️
Reheating is where dryness often happens, because cooked chicken can’t “gain back” lost moisture. The best method is slow and covered, with a touch of added steam.
- 🍳 Skillet (best): add a teaspoon of water or broth, cover, warm over low heat until just hot.
- 📺 Microwave (fast): cover with a damp paper towel, heat in short bursts, stop as soon as warm.
- 🔥 Oven (batch): wrap in foil with a spoon of broth, warm at 300°F until heated through.
A common mistake is reheating to “piping hot” out of caution. The chicken is already cooked; it only needs to be warmed. Overheating re-tightens proteins and pushes out remaining moisture. The best reheated chicken tastes like it was gently coaxed back to life, not punished back to temperature.
Weeklong menu ideas that keep chicken exciting (without repeating the same dinner) 🍽️
Juicy baked chicken breast is a building block. The same batch can feel different each day with smart pairings: Caesar salad one night, rice bowl the next, a wrap after that. Keeping condiments and crunchy vegetables on hand (cucumbers, shredded lettuce, pickled onions) makes those meals feel fresh.
For a realistic weekday pattern, Mara’s schedule works: Monday chicken over greens, Tuesday chicken in a grain bowl with roasted vegetables, Wednesday diced chicken with hummus and pita, Thursday quick taco plates with lime. No boredom, no dryness, no drama. The insight to carry forward: the best meal prep chicken is cooked for versatility, then finished with contrast.

Hi, I’m Landon Brooks. I am the editor-in-chief of Cook and Design, but for the first decade of my working life I was actually a product designer in New York.