
| Sections / What’s inside 📚 | Key takeaways / What to remember ⚠️ |
|---|---|
|
|
A single clear rule improves every backyard cookout: control the heat, not the sausage. This short editorial note frames timing as an intentional design problem—temperatures, link size, casing type, and simple tools should be arranged like components in a well-composed meal. The following sections treat grilling sausage as a set of practical patterns, illustrated through the recurring example of Mina, a design‑minded home cook who runs a small supper club and treats every link like a plated object.
How Long Should You Grill Sausage: Two‑Zone Timing and Temperature
The first step to predictable sausages is adopting a controlled heat strategy: the two‑zone method. Create an indirect side at 300–350°F and a direct sear zone at a higher temperature for finishing. This method prevents casings from bursting while allowing interior temperatures to climb steadily. Begin with links at room temperature—let them sit 20–30 minutes—so the interior warms and the cook time shortens.
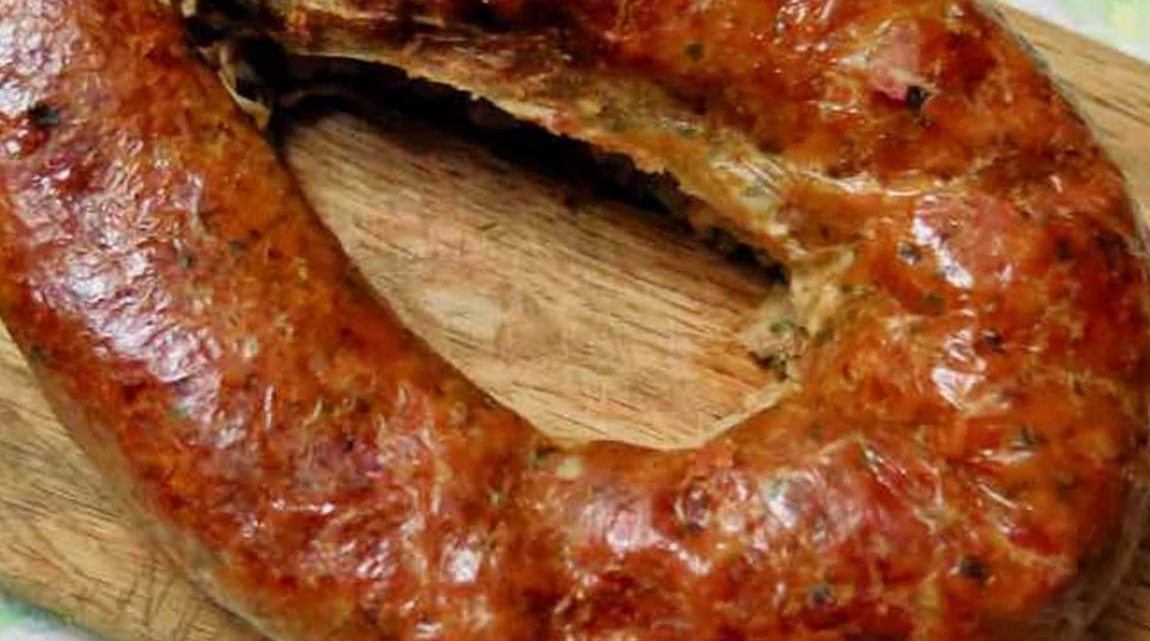
When placed over the indirect zone set to roughly 300–350°F, sausages cook gently and the fat renders without violent flare‑ups. Turn the links every 2–3 minutes to equalize color and heat exposure. After about 8–10 minutes of indirect cooking, they will be close to done; move them to direct heat for a brief 1–2 minute sear per side to create a crisp casing and attractive charring. The sear delivers the visual snap guests expect, while the gentle indirect phase protects juiciness.
Sizing, casing, and the room‑temperature rule
Link dimensions change the math. A typical 4–5 inch, 1‑inch thick link behaves predictably in the two‑zone rhythm described above. Natural casings remain supple and produce a satisfying snap; synthetic casings resist splitting but can look less hand‑finished. For Mina’s supper club, matching aesthetics to texture matters: natural casings get the sear; synthetic links are reserved for faster service.
Letting sausages sit at room temperature for 20–30 minutes prior to grilling prevents the exterior from overcooking while the core lags behind. This modest step shortens the grill time and reduces the temptation to crank the heat, a frequent source of burst casings. In terms of safety and design, it’s a small operational choice with outsized impact.
Finally, use a reliable thermometer. Insert the probe into the thickest part of the link and avoid touching the casing or the grate. Aim for a pull‑off of 155°F, then finish with a sear so carry‑over brings the reading into the 160–165°F safety window. That measured approach keeps results consistent and visually pleasing. Key insight: the two‑zone method is not an extra step—it’s the structure that makes perfect timing possible.
How Long to Cook Sausage on the Grill: Fresh Pork and Beef Timing
Fresh pork and beef sausages require an attentive blend of low‑and‑slow with moments of heat. The recommendation for many home cooks is simple: thin links 6–8 minutes, thick links 10–12 minutes, but the oven‑like nature of an indirect grill means times will flex with diameter and fat content. For a typical bratwurst or Italian link, preheat the grill to a stable 300–375°F indirect zone; place sausages on the unlit side.
Turn once or twice during the indirect phase—generally after about 6–8 minutes—then transfer to direct heat for roughly 2 minutes per side to develop color. If the links are particularly thick (over 1.25 inches), drop the indirect zone to 300–325°F and allow 15–20 minutes total to gently render fat and prevent splitting. In a catering scenario, Mina will parboil thick pork links for 5 minutes to accelerate service and reduce grilling stress; on the grill they need only 4 minutes per side afterward.
Carry‑over, thermometer placement, and visual cues
Carry‑over heat matters. Pull sausages when the thermometer reads about 155°F; residual heat will bring them into the recommended 160–165°F as they rest. Probe placement is important—insert the thermometer into the thickest cross section, ideally from the end of the link, to avoid false highs from the casing.
Visual cues can mislead. Color alone is unreliable; a brown exterior might still conceal an undercooked center if the grill was too hot. Likewise, firmness is a poor proxy when fat content varies. The thermometer replaces guesswork and preserves the careful aesthetic Mina aims for—consistent browning and a plump interior that slices cleanly on a ceramic plate.
If a grill is unavailable, a stovetop‑to‑oven approach mimics the two‑zone method. Brown links in a skillet, then finish in a 325°F oven until the internal temperature target is reached. That alternative keeps texture consistent and is especially useful in months with unpredictable weather. Key insight: for pork and beef, tempo beats frenzy—controlled heat and thermometer discipline create predictable timing and a composed plate.
How Long Chicken Sausage on Grill: Safe Temperatures and Tips for Juicy Flavor
Poultry sausages need slightly different treatment: they are leaner, more prone to drying, and must reach a higher safe endpoint. The safe internal target is 165°F. Start with the grill preheated and set an indirect zone in the 300–375°F range. Place links on indirect heat for about 8 minutes per side, turning every few minutes, then finish with a steady 350°F direct sear for 1–2 minutes per side to crisp the casing without splitting it.
Because poultry proteins lack the fat cushion of pork, fat rendering and moisture retention are design problems. parboiling poultry sausages for 3–5 minutes before grilling is an effective technique to firm the casing and reduce searing drama. Mina often uses parboiling for chicken‑based links when presenting a composed plate at her supper club; it ensures a predictable interior while allowing a quick, attractive char.
Grill surface, oiling, and safe pull‑offs
A clean, lightly oiled grate prevents sticking and promotes even browning. Use tongs and avoid pressing the link with a spatula; pressure forces juices out and flattens the aesthetic. A good workflow is to preheat, grill indirectly until within 3–5°F of target, then sear briefly to finish. Pull the sausage at 160–162°F to allow carry‑over to reach 165°F during rest; this honors both food safety and texture.
For variety, brined or marinated poultry links require adjustments. Excess sugar in a glaze can burn quickly on a hot grate; add sweet finishes during the last 30–60 seconds and watch carefully. When serving, slice at a slight angle and arrange on a matte plate so the cross‑section reads cleanly—Mina’s clients respond positively to the visual cue of an evenly cooked spiral of meat and rendered fat.
Key insight: treat poultry sausage like a delicate object—gentle heat, thermometer discipline, and a brief finishing sear produce a safe, juicy result with an elegant appearance.
Juicy Grilled Sausage in 15 Minutes (Two‑Zone Method) — Smoked and Pre‑Cooked Strategies
Smoked or pre‑cooked sausages are about reheating with restraint. Because these links are already cooked, the goal is to warm through and add texture without overcooking. A steady grill set to 350°F does the job: sear each side for 1–2 minutes on direct medium heat, then shift to indirect heat for a total of about 10 minutes, turning halfway. Use an instant‑read thermometer to confirm internal targets: 145–155°F for smoked varieties, 160–165°F for pre‑cooked links that should taste hot and fresh.
This quick‑service approach fits small events and pop‑ups. For Mina’s weekend market cart, smoked links are seared to order and slid into steam‑tight trays to hold heat. Keep a drip pan under indirect sausages to catch excess fat and avoid flare‑ups. If subtle smoke is desired, a short 225°F cold smoke for 15–30 minutes prior to direct grilling can layer depth without extending service time significantly.
Practical case: a 50‑person supper club service
In a recent hypothetical service, Mina needed to serve 50 guests with minimal staff. Pre‑cooked sausages were seared and finished on a two‑zone grill. The strategy: maintain a 350°F working temp, sear for 90 seconds per side, then hold on indirect heat at 300°F until service. Thermometer checks were taken randomly at the thickest sections; once the reading reached the 160–165°F window, links were plated. This workflow balanced speed and consistent presentation—each sausage showed a uniform crust and plump interior.
Key insight: reheating is a design challenge—respect the original cook and aim to highlight texture without re‑cooking the protein into dryness.
Turn, Rest, Tools, and Common Mistakes When Grilling Sausage
Timing is half of the conversation; the other half is technique. Turning every 2–3 minutes ensures even color and prevents hot‑spot scorching. Use tongs—never a fork—to protect the casing and retain juices. Rest sausages for 5–10 minutes after pulling; this step allows juices to redistribute and temperature to equilibrate via carry‑over heat.
Thermometers are non‑negotiable. An instant‑read probe with ±1°F accuracy and a stem long enough to reach the center avoids guesswork. Insert from the end and avoid contact with grates to get a truthful reading. A surface or lid thermometer helps maintain steady grill zones; place it near the indirect side to monitor the working range.
Checklist: Tools and actions for reliable results ✅
- 🔪 Instant‑read thermometer (±1°F) — probe into thickest part
- 🥢 17″ tongs — gentle grip, no puncture
- 🔥 Two‑zone grill setup — one side indirect, one side for searing
- 🕒 Turn every 2–3 minutes — even browning and consistent interior
- 🛌 Rest 5–10 minutes — preserve juices and finish via carry‑over heat
Common mistakes include starting on full blast (which yields burnt exteriors and raw centers), piercing the casing, crowding the grate, and ignoring thermometer readings. Another mistake is relying solely on time; link thickness and fat content alter the cooking curve. For visual design, avoid over‑charred exteriors—thin, even charring reads better on a plate and aligns with the magazine’s Korean‑modern visual sensibility.
Storage and reheating: refrigerate leftovers within two hours in an airtight container. Reheat to 165°F before serving. When planning menus, factor carry‑over and resting into service timing so plating aligns with optimal texture. Key insight: discipline with tools and small habits turns timing into repeatable craft rather than guesswork.

Hi, I’m Landon Brooks. I am the editor-in-chief of Cook and Design, but for the first decade of my working life I was actually a product designer in New York.
3 Comments
Love the two-zone method—like zoning for perfect neighborhoods. Let’s fire up the grill for a block party!
The two-zone method is like thermal engineering for your grill—predictable, controlled, and keeps the casing intact. Nice breakdown.
Accurate temps matter more than fancy equipment—165°F poultry, no guesswork. Thanks for the data, Landon.
Les commentaires sont fermes.